Tuesday 26 November 2013

Retrospective


When I went into this MA, I wasn’t entirely sure what direction I wanted to go in. I knew I wanted to focus on video game characters at least, and improving my 3D skills when it came to translating my 2D art into 3D characters. I knew what inspired me as an artist and I wanted to figure out how I could incorporate my inspirations into the characters I designed.

A lot of my influences came from animation and comic books, so I wanted to try and bridge the gap, visually, between those and games.

I started by looking at some video games that already have visual aesthetics similar to the comics that I drew my own influences from. Gearbox’s Borderlands series had some really unique visuals that reminded me of the artwork of comic book artist John Romita Jr.

Borderlands by 2K Games
Image source: http://nightmaremode.net/wp-content/uploads/2012/02/borderlands3.jpg
Last accessed 9th December 2013

Kick Ass 2 by Mark Miller and John Romita Jr.
Image source: http://imgs.abduzeedo.com/files/articles/john_romita_jr/2ph.jpg
Last accessed: 9th December 2013

However, beyond the unique textures, there wasn’t much else that emulated comic book art within the game.

I also looked at redesigning classic characters by putting a new spin on the series. This culminated in a few redesigns of the Seven Dwarves from Snow White as space miners.


I even got in so far as to attempt modelling one of the dwarves.


I loved the chunkiness and shape of cartoonish characters when modelled in 3D, and realised that it’s not often that you see a clear transition from a game’s 2D art to its 3D aesthetics.

I wondered why, if anything, most games today tend to stray from stylised aesthetics and favour a more realistic approach other than just the jump in technology.

In my literature and contextual review, I explored the ongoing debate of aesthetics versus graphics and whether or not it had an effect on how immersive that game was to the player.

Through my literature review, I determined that neither graphics or aesthetics alone determined how immersive a game was. In fact, it seemed as though it did not matter how stylised or realistic a game was, as long as it had a unified visual aesthetic, and suspended the player’s disbelief, the characters and world would be immersive either way.

In my contextual review, I determined that, as impressive as technology and graphics have gotten, it was much easier to determine a character’s role and determine the expressiveness of a character in a game with a strong stylised aesthetic. This was also backed up later on by my personal research studies and speaking with industry professionals in my practitioner study report.

Learning that immersion wasn’t affected specifically by either aesthetics or graphics kind of gave me the freedom to focus on stylised characters. I knew that just because a character might look cartoony, it didn’t mean that the character would be less believable or that an audience would be less involved with that character.


By this stage I was still figuring out what direction I wanted to go in but I was starting to narrow my focus. I was looking into the best way to present any 3D characters I designed and modelled, and the best idea that came to my mind involved merchandised 3D statues. Like those from Gentle Giant Ltd and Electric Tiki Design.

Boba Fett by Gentle Giant Ltd.
Image source: http://ryanlb.com/images/starwars/images/boba-fett-animated-maquette-2.jpg
Last accessed: 9th December 2013
Nightmare of Elm Street's Freddy Krueger by Gentle Giant Ltd.
Image source: http://media.archonia.com/images/samples/23/63/62363_s0.jpg
Last accessed: 9th December 2013

These heavily stylised statues, based on characters from popular television and movie franchises, had spades of character, not only in their actual design, but in the character’s gesture and implied movement. I knew from the moment I spotted these that this would be a fantastic way to present any future characters.

I also, briefly, touched on character driven narratives. The classic hero’s journey often follows a character’s progression from zero to hero or puts the character through a grueling quest that has the character learn, grow and develop over the course of the story, for better or worse.

It started to dawn on me that there’s much more to characters in games than simply their design. The design is just the first impression.

A character is as much about their personality and development as they are made to fit within a role within an established world. I thought about how interesting it would be to see a character break out of a perceived role.

I got to a point where I started to focus more and more on trying to translate 2D visual styles into 3D. I have a strong 2D art style myself and I thought it would be interesting to see how that would work in 3D, if at all. I took one of the 2D characters I designed early in practise 1 and modelled it in 3D.


This helped me better understand how to get 3D characters to emulate a 2D visual style without losing those hard edges or complicating the silhouette. Thanks to this, I wanted to see, or have, games that pushed their aesthetic style to those that emulated traditional 2D animation while actually being in 3D. Almost like having a playable cartoon or comic book.

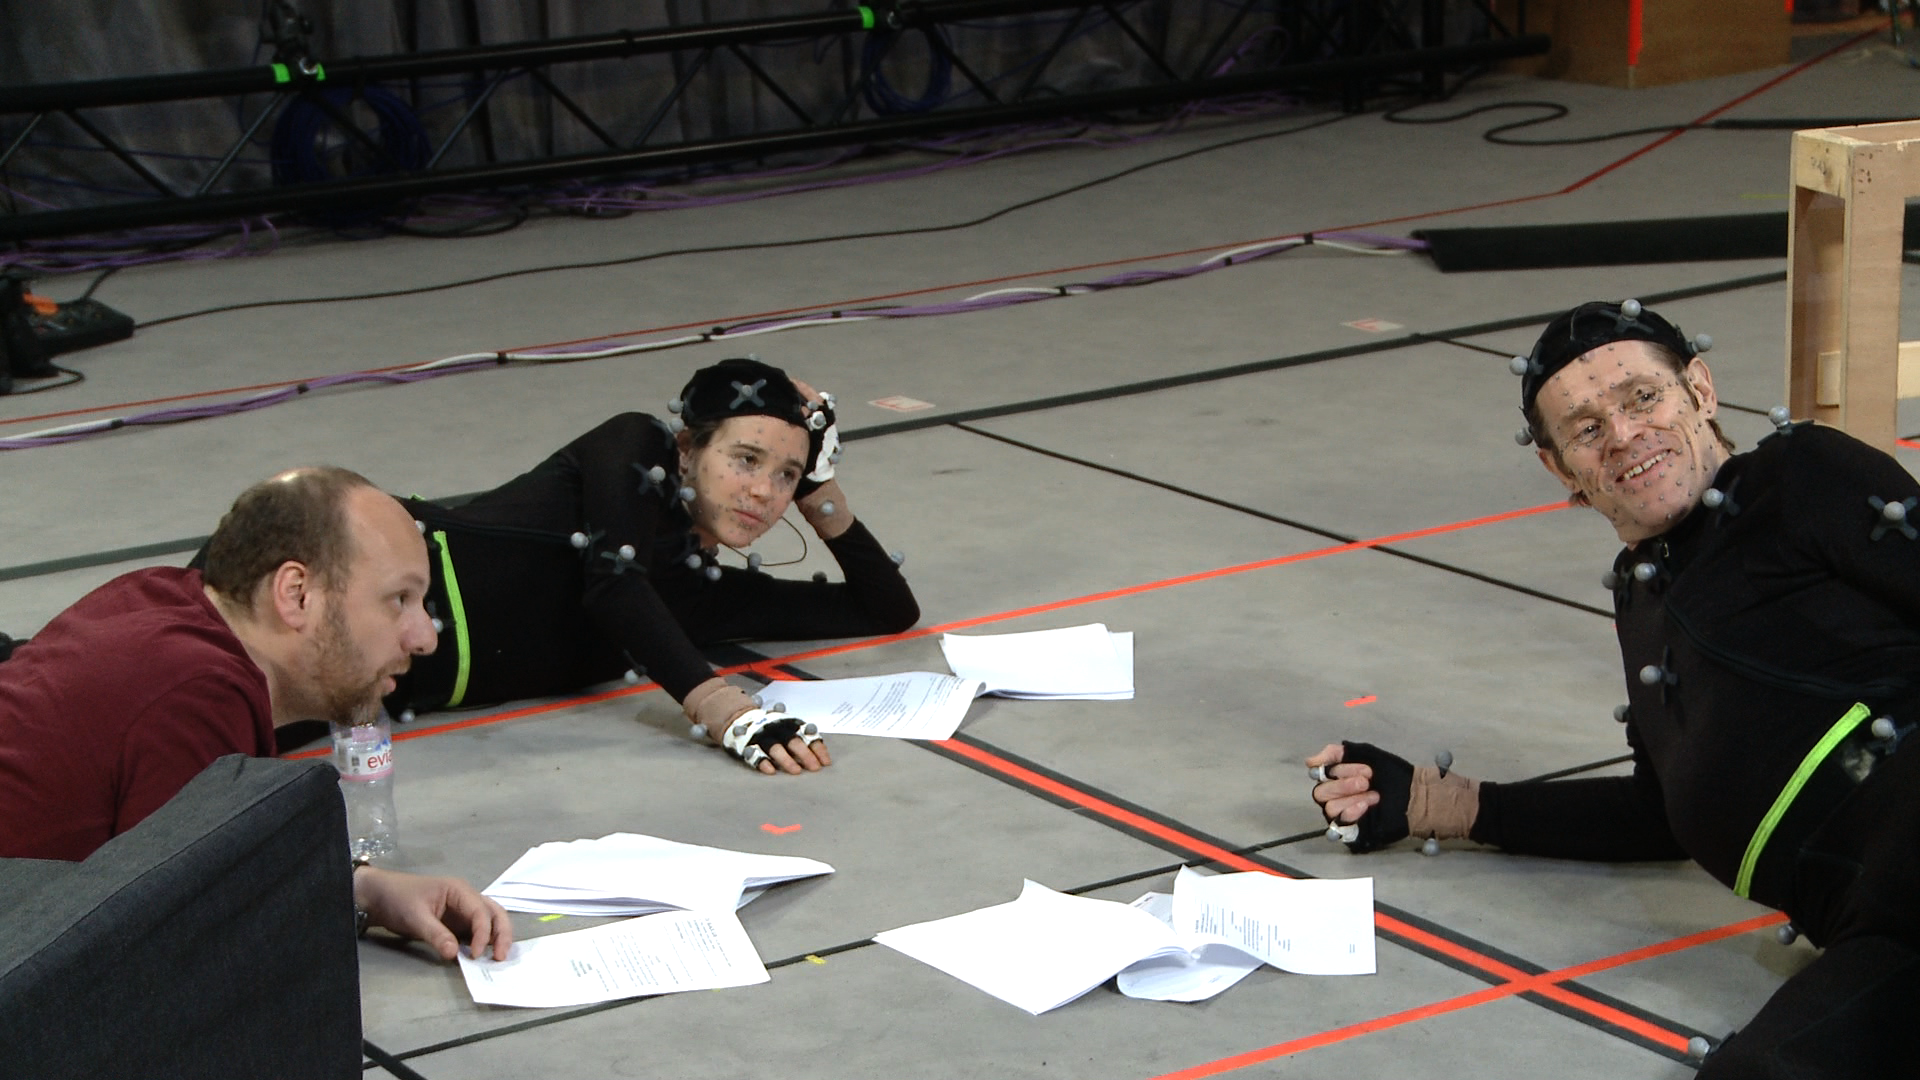
It was at this stage that I was given the chance to play around with motion capture. It was a fantastic opportunity but, unfortunately, I had no previous experience in rigging or animating 3D characters. It was a process I had to learn from scratch and, in doing so, I’ve yet to really see my characters animated yet. It took me roughly 4 months to learn how to rig, weight and import my character into the necessary programs.

As this is a game’s design course, I started to think about how I could communicate this idea of translating 2D art styles into 3D, as well as character driven narratives into a game idea that didn’t require a programmer or, necessarily, a team to pull off. One that also incorporated the merchandising of 3D sculptures or models. This idea was an analog tabletop game involving figures or miniatures. This is what I will work on for the remainder of my second practise and bring into practise 3.

Tuesday 12 November 2013

A Bit on the Side

Throughout this portion of the MA, I've also been experimenting with styles and crossovers. Sometimes I think it helps to have a bit of mindless fun and draw something I like or mess around with some ideas.

My crossover of Pendleton Ward's Adventure Time and Naughty Dog's fantastic The Last of Us.

The first crossover got me some traffic so I felt compelled to do a second.

Experimenting with races and characters from BioWare's Mass Effect series.

And experimenting with cel shading on the protagonist of Ubisoft's Assassin's Creed IV: Black Flag, Edward Kenway.

All of these are available to see on my Tumblr blog: http://pixelpeepers.tumblr.com/

I was also lucky enough to get in contact with Scott Wegener, the co-creator and artist of the Eisner Award nominated limited series Atomic Robo.

Atomic Robo by Brian Clevinger and Scott Wegener
Image source: http://media.rvanews.com/wp-content/uploads/2013/07/AtomicRobo-Dino.jpg
Last accessed: 8th December 2013

As I have more than a passing interest in comics, I was interested to know what kind of work he did when creating a world for a set of characters within a new IP. Specifically, I asked him whether it was worth starting with a fully defined world for his characters to be a part of or whether the things he wanted his characters to do determined the world they were in:


Wegener responded, "The more you can work out in advance the stronger your work will be. Before we ever started working on the first volume of Atomic Robo we knew who he was, and what the major plot points of his life and development were going to be.

"With a solid framework to hang our work from it has made expanding on those initial ideas, and just making up new stuff, a LOT easier than it would have been if we’d gone in with no plan.

"That basic character arc and world-building helped define the rules of our fictional universe. Are there aliens? No there are not. So no alien stories. Ghosts? Nope. In his early life Robo is pie-eyed and fairly patriotic, like a lot of young people. As he gets older and more experienced he learns not to take things at face vaule. And soforth. 

"We certainly do make up a lot of Robo’s “history” on the fly, but we know what new elements will and will not “feel” right because of that initial work we did."

Even in something as character focussed as Atomic Robo, the rules of the world he's a part of were still defined before the stories could be determined. This kind of made me think that the world itself is just as important in defining a character's capabilities as anything else. In future, I should think about the world in which the characters inhabit and take that into consideration, if i didn't already.

As a "thank you," I did some doodles of Atomic Robo's titular hero.


Tuesday 29 October 2013

Motion Capture, Part 3: Learning to Weight Paint


Weight painting the model turned out to be the most tedious and pain staking part of this model. I had absolutely no experience weight painting models before and could, honestly, still do with more practise.

Several problems seem to arise throughout the weight painting process, most of which I had no idea how to fix or seemed to fix themselves. On rare occasions, the skeleton detached from the mesh, resetting the weights when they were bound together again. Sometimes, influence on joints could not be selected until after Maya and/or the computer were restarted. Also, when paint the actual weights, I was unable to remove, only add, influence until after Maya and/or the computer was restarted. All in all, this lead to a very long and, metaphorically, painful weighting experience.

In addition, I had difficulty removing the influence some joints had over unrelated verts using the brush tool and relied on the component editor to manually remove unnecessary influences. The component editor saved the day when I was starting to get fed up with the whole process.

It looks complex but it's very helpful.

After a very long and arduous learning experience with the weight painting process, the model was finally weighted and ready to go.

Changing the value in the tool settings is handy for adding and removing influence on joints.


I imported the weighted model into Motion Builder, ready for testing the animation.

Tuesday 24 September 2013

Shintaro Ohata

While looking into ways to present 3D characters in interesting ways, I stumbled across the artist Shintaro Ohata. Ohata's work's primary feature is combining 2D art with 3D sculpture. Both the 2D and 3D elements of his artwork have their own features and purposes that work together as a whole piece.

Specifically, the 2D portion of his artwork often depicts and environment or scene, either within every day life or from a movie, focussing primarily on the scene's light source. The 2D component is what creates the atmosphere for the piece as a whole, depending on the colour of the light sources and the scene itself.

Afterglow (2011) by Shintaro Ohata
Image source: http://yukari-art.jp/images/2011/11/ohata_afterglow.jpg
Last accessed: 7th December 2013

What makes Ohata's artwork so interesting are the 3D sculptures that are married to each painted scene. The sculptures often show at least one or more stylised characters that are painted using the light sources from the 2D backdrop as a guide, painting the sculpture as though the lights in the painting were reflecting on the character. What this produces is a single piece that blends seamlessly when viewed from the perfect angle and provides a 3D work of art that contains predetermined lighting and shadows.

In the Sound (2012) by Shintaro Ohata
Image source: http://yukari-art.jp/images/2013/01/ohata_in-the-sound31.jpg
Last accessed: 7th December 2013

In the Sound (2012) by Shintaro Ohata
Image source: http://yukari-art.jp/images/2013/01/ohata_in-the-sound1.jpg
Last accessed: 7th December 2013
In the Sound (2012) by Shintaro Ohata
Image source: http://yukari-art.jp/images/2013/01/ohata_in-the-sound22.jpg
Last accessed: 7th December 2013

What interested me is that Ohata's technique combines the sort of things I've been looking into with creating sculptures out of 3D characters and combing it with replicating comic book lighting and aesthetics in 3D. Visually, his work his very striking and interesting, and could serve as the perfect inspiration for presenting my own 3D characters.

Tuesday 27 August 2013

Motion Capture, Part 2: Importing to Motion Builder


Before I even attempted to paint the weights on my character, I wanted to see if I could import it into Motion Builder and get it set up. Although, there weren’t many internet tutorials that I found helpful but I managed to figure out what needed to be done to import a file into the program.

In order for Motion Builder to correctly work out the joints in the arms, the model would need to be in a perfect t-pose. So, I went back and altered the model to fit it into a t-pose, redoing the skeleton also. It's also extremely helpful to name all the joints of the skeleton for the setup process.


Before it can be imported, the Maya file need to be exported as an FBX file. The file needed to included the mesh and bound rig, and have the textures displaying before export for them to show up in Motion Builder.

Unfortunately, on my first real attempt, the arms of the skeleton kept showing up as orange on the display in the Character Controls window, meaning that something wasn’t lining up properly. I had to tweak the skeleton in the arms until it showed up correctly.

With model altered, I then properly imported it into Motion Builder correctly and made sure it was ready to use.

To make it easier to find the files, right click in the bottom right, where it shows Characters, and "Add Favourite Path.".

Select the folder that contains the FBX and click OK.

The files should show in the bottom right. Click and drag the file onto the grid and click <No Animation> to import.

After importing the file, drag the "character" icon from the bottom right to the grid, this should open the Character Settings and Character Definition boxes in the bottom left.

Click on Character Definition, find the joints in the menu on the far left and drag them to the appropriate label in the Mapping List. So, for example, I dragged the bone labelled "hip" to the "hips" label. Now Motion Builder recognises that bone as the hips because the hips are green on the silhouette beneath Character Controls.

Do this for all the joints in the legs...

...And upper body. When the skeleton is green, the joints have been mapped correctly.

To finalise the skeleton, click the Characterise tick box under Character Definition. In the small character window that comes up, click Biped, as the character walks on two legs.

Once the rig has been characterised as a biped, click Create under Control Rig in the Character Definition menu.

Set the Control Rig to FK/IK.

Now the rig is ready for animating!

Now that I know how to import a model into Motion Builder and that it will work properly with the rig, all I need to do is learn how to properly paint the weights of the model.

Tuesday 30 July 2013

Motion Capture, Part 1: Learning to Rig


Early in July, the opportunity arose to try out motion capture, or mo-cap,  within the university, sort of a joint project with the drama department. Motion capture is, basically, recording the movements of real actors and using those to animate a 3D character without the need for hand animation. It was a fantastic opportunity to get a character animated without much knowledge in animating a 3D model.

Not to mention the stylish mo-cap suits.
Beyond: Two Souls by Quantic Dream and Sony Computer Entertainment.
Image source: http://farm9.staticflickr.com/8086/8516491143_0eb89d82b4_o.png
Last accessed: 7th December 2013

After the first meeting, it was established that, in order for the process to begin, I would need a rigged and weighted 3D character ready to import into a program called Motion Builder by Autodesk. It quickly dawned on me that I knew very little about rigging 3D characters, almost nothing about weighting characters and less than that about using Motion Builder.

So, my first objective was to teach myself a little bit about how to properly rig a character I’d already modelled, with the help of a few internet tutorials.

I then set about creating a rig for my monkey character.

I created the rig by going to Skeleton > Joint Tool and started with the base of the spine.

I created one half of the rig from the root at the skeleton.

I mirrored the arm and leg joints.


With the rig complete, I combined it to the mesh by selecting both and going to Skin > Bind Skin > Smooth Bind.

With the model rigged, my next objective is to see how difficult it will be to import a rigged mesh into Motion Builder because this program is also completely new to me and I have no idea how long or labourious the process will be.